Now that you are a collaborator, let’s use the local workflow we just learned to make changes to this repository.
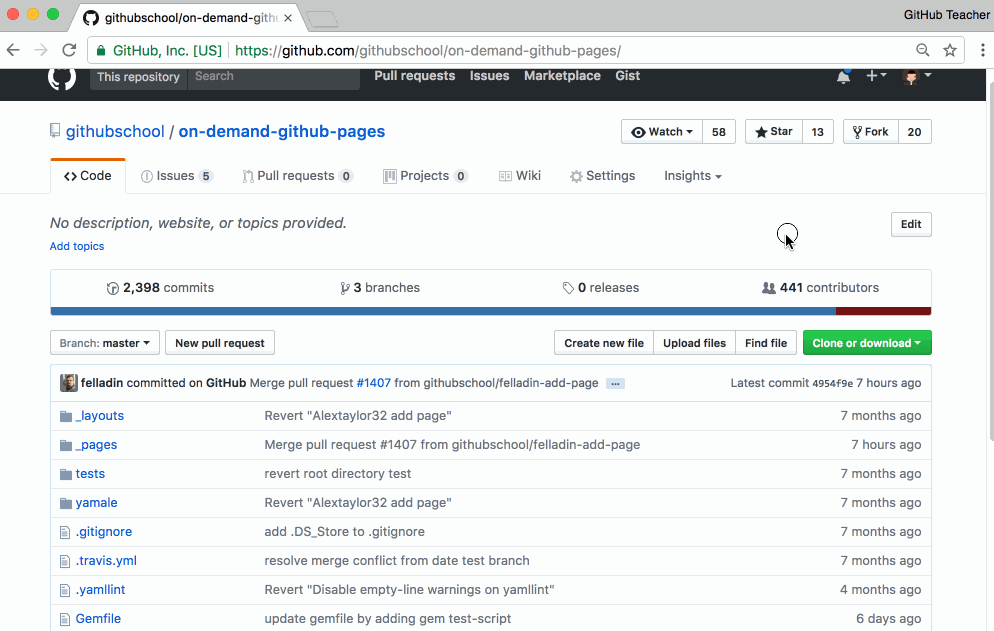
- Start from the Code tab of the class repository on GitHub.com.
- Click on
Clone or Download. - Click
Open in Desktop. This will open GitHub Desktop. - Confirm the
Local Pathas the place you’d like to store the repository locally. - Create a branch by clicking “Branch > New Branch” and label it with your username, something like
yourUsername-add-page. - In your favorite text editor, add a file to the
_pagesdirectory. Include your GitHub handle in the filename:username.yaml. -
Enter the following content into your file:
--- githubHandle: YOUR-USERNAME pageUrl: YOUR-HANDLE.github.io timestamp: TODAYS-DATE-YYYY-MM-DD --- - Ensure you’ve replaced
YOUR-USERNAMEwith your GitHub Username,YOUR-SITES-URLwith the URL to your site (which should beYOUR-USERNAME.github.io), andTODAYS-DATE-YYYY-MM-DDwith today’s date, using a 4-digit year, 2-digit month, and 2-digit day. For example, if today is October 17, 2016, you would enter:2016-10-17. - On GitHub Desktop, within the
Changesside bar, ensure your file is checked. - On GitHub Desktop, enter a commit message describing the change you’re introducing to the project.
- On GitHub Desktop, click the
Commit to YOUR-BRANCHbutton – ensureYOUR-BRANCHincludes your username.
Tell me why
Reviewing the GitHub Flow
Remember, the 5 steps of GitHub Flow are:
-
Create a branch
 (This section deals with this step.)
-
Make commits (And this one.)
- Open a Pull Request
- Collaborate, and make more commits
- Merge the Pull Request
Hopefully this looks familiar since you’ve followed this workflow (at least) twice. Now you will follow it once more to add your page to our directory.
Stuck? Open an issue in the repository for this class and mention @githubteacher for help from one of the GitHub trainers!