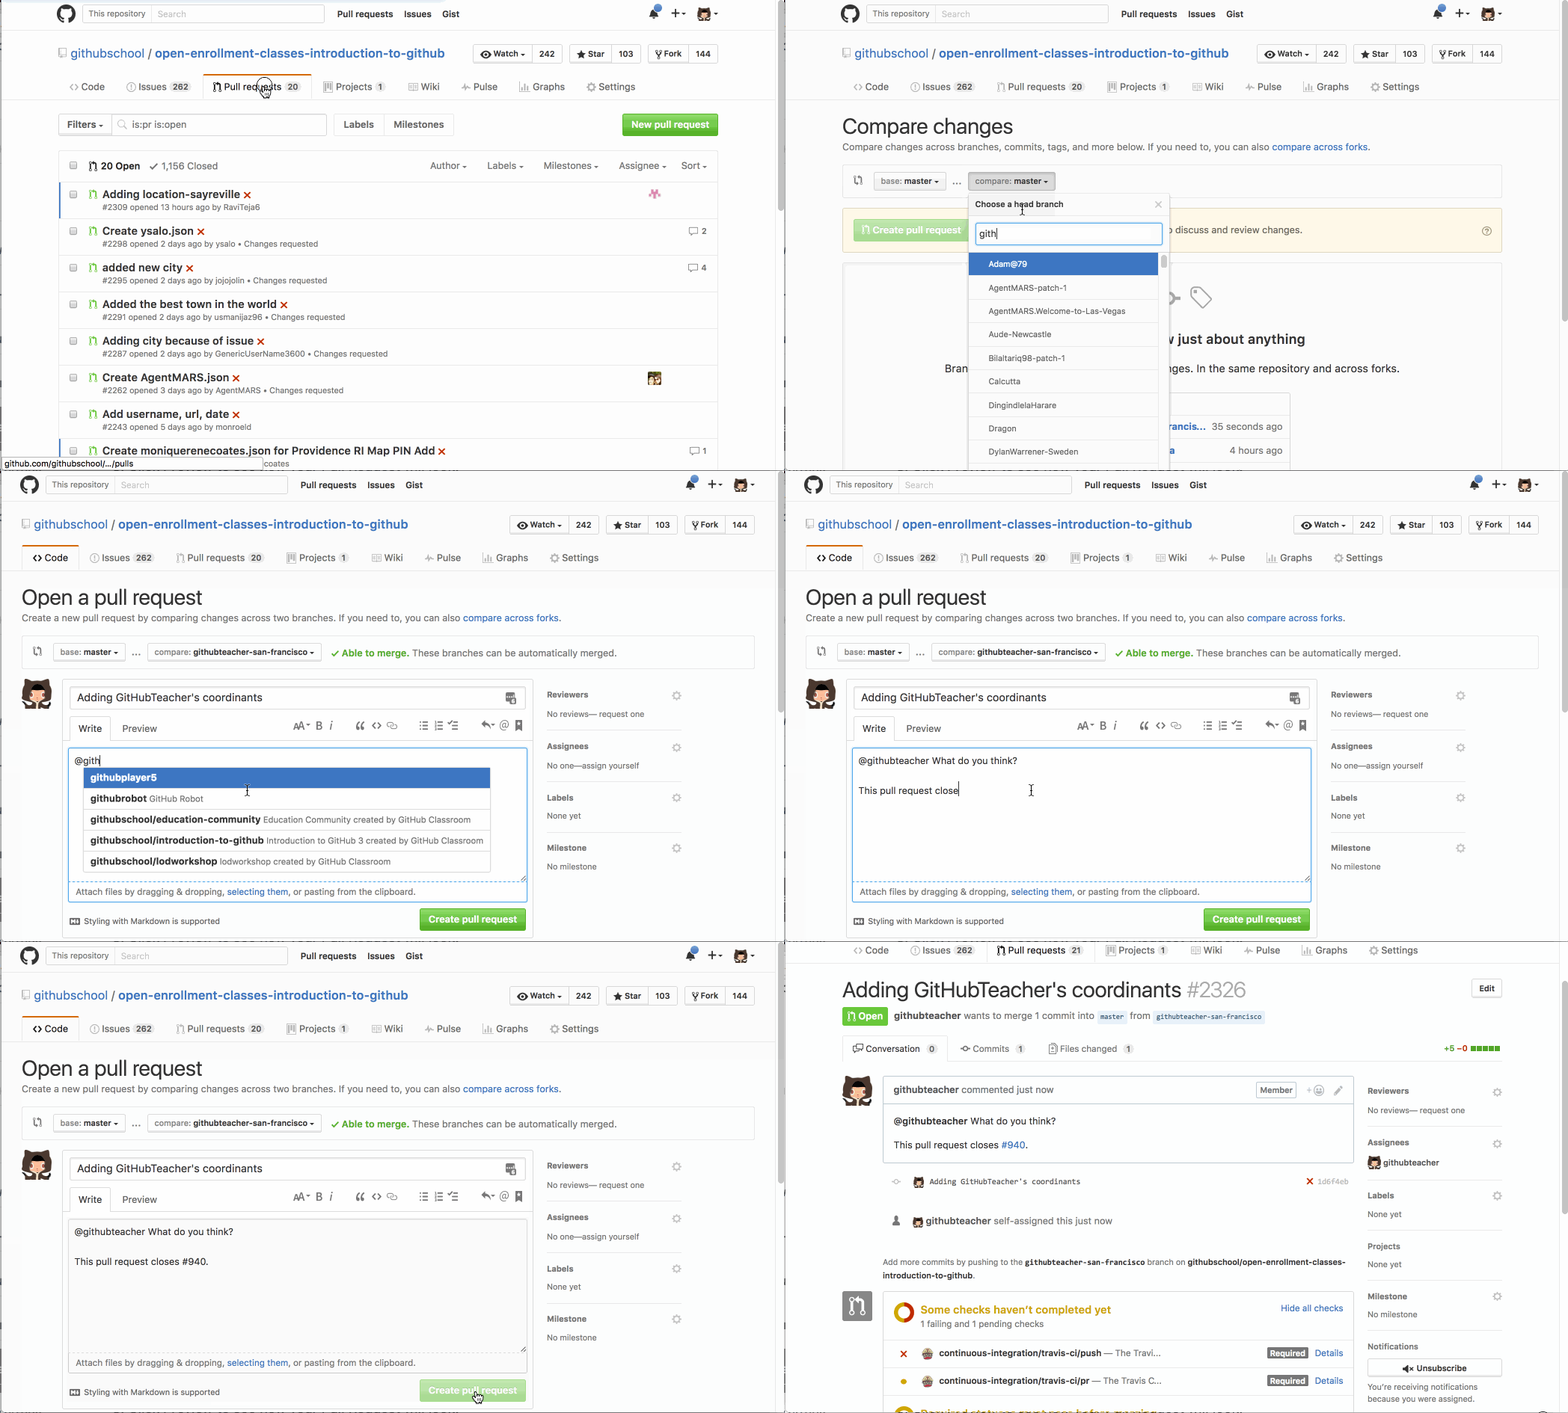
Now that you have created a file, you will create a Pull Request to show your proposed changes to others who are completing this project:

- Navigate to the Pull Requests tab.
- Click
New Pull Request. - In the base dropdown, choose
master. - In the compare dropdown, choose your branch.
- Click Create pull request.
- You can leave the default title or make it more descriptive.
- Use markdown formatting to explain the work you have done on your branch.
- Summarize your proposed change.
- Mention the training team using
@githubteacher. - Use the keywords
closesimmediately followed by your issue number (e.g.closes #3)to note which Issue the Pull Request is addressing. When you do this, the issue will be automatically closed when the pull request is merged.
Pull Request messages are an excellent opportunity for you to describe the changes you have made to the project. For example, you could also include information explaining the type of feedback you’d like others to give you or providing collaborators an idea of your timeline.
- Click Preview to see how your Pull Request will look.
- Assign the pull request to yourself by clicking assign to yourself in the Assignees section.
- Click
Create pull request.
Tell me why
Collaborating on Your Code
Let’s think back to the GitHub workflow again. You have created a branch, added a file, and committed the file to your branch. Now it is time to collaborate on your file with the other students taking this class. This collaboration happens in a Pull Request. Check out this video to learn more:
Stuck? Open an issue in the repository for this class and mention @githubteacher for help from one of the GitHub trainers!